How to read a museum art label: dates, materials and numbers
Which date belongs to the artist, which to the artwork, and what does the number at the bottom do? Use one fictional label to separate them, then try a real one.
Read the line that answers your question
A museum label can hold several different dates, a donor’s name and a string of numbers. To make sense of it, identify what each line describes: the maker, the work, or the museum’s collection. The year beside a person’s name and the year inside an accession number do different jobs.
This guide is for the short identifying labels beside artworks and the similar information in online collections. Layouts, terminology and numbering systems vary. You do not need to decode every character to enjoy a work. Choose one thing you want to know, find its line, then return to the object.
A label to practise on
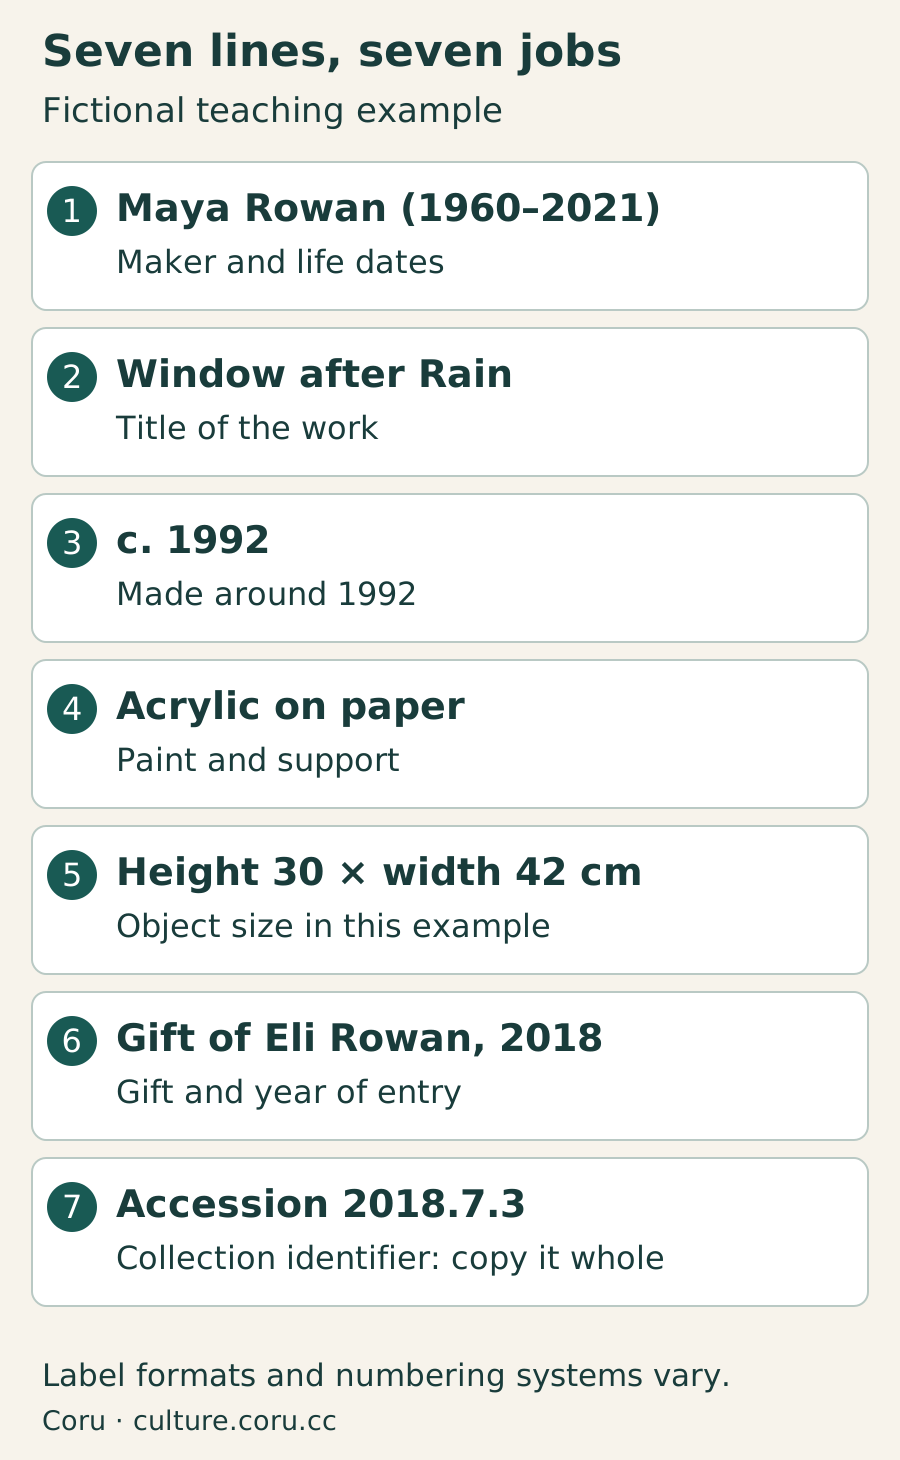
The diagram below is an invented teaching example. Maya Rowan, the artwork, the donor and the collection record are all fictional. It is not a label from a real museum.
Read it as: Maya Rowan (1960–2021); Window after Rain; c. 1992; acrylic on paper; height 30 × width 42 cm; gift of Eli Rowan, 2018; accession 2018.7.3. Before reading the explanation, decide which number answers “When was this made?” and which detail would help you find the same object again.
1. Separate the maker from the title
The artist or maker line tells you whom the museum credits. It may name a person, a workshop or a culture rather than an individual. Keep qualifying words: the Mint Museum explains “attributed to” as a likely identification without definitive proof. Dropping those words changes the claim.
In our example, 1960–2021 belongs to Maya Rowan’s biography; Window after Rain names the work. A title can help you notice a subject, but it is not necessarily the artist’s own wording: the Terra Foundation explains that some titles were assigned later. If that distinction matters to your question, look for a title note in the collection record.
2. Find the work’s date, including its uncertainty
Here, c. 1992 is the proposed date of the artwork. The abbreviation c. means circa: approximately. It does not turn 1992 into an exact year. If you copy the date into your notes, keep the c., “about”, or any range printed with it.
On a photograph’s record you may see separate dates for the negative and the print, as the New Mexico Museum of Art explains. Read the words beside each date before choosing one. A later print date does not necessarily mean the photographed scene occurred then. For our fictional painting, the useful note is “made around 1992”, not “made in 1960” or “made in 2018”.
3. Use materials and size to return to the work
The medium line describes the materials and can include how they were used. In our example, acrylic is the paint and paper is its support. Try looking again for a detail that interests you: a thin wash, a thick mark, or an exposed edge. Treat that as a looking prompt, not proof that you have identified the technique by eye.
The example explicitly says height 30 × width 42 cm: wider than it is tall, and much smaller than a wall. Real records may distinguish the image, sheet, object and frame. Check the measurement labels and units before imagining its size; a photograph on your phone has no fixed relationship to the object’s dimensions. If the order or the part measured is unclear, use the museum’s fuller record rather than guessing.
4. Read the gift and the number as collection information
“Gift of Eli Rowan, 2018” describes how our invented work entered its fictional collection. It does not identify the painter. A credit line may instead mention a purchase, a bequest, or a lender; read its actual wording before assuming the displaying museum owns the work.
The accession or object number is a reference used by the collection. Do not treat it as the artwork’s creation date. Number structures differ: Akron explains 1923.1 with the acquisition year first, while MoMA’s catalogue guide explains 617.1996 with the year last. Extra components can also have institution-specific meanings. Our invented 2018.7.3 is simply the identifier to copy; the label alone does not explain what 7 and 3 mean.
For a later lookup, keep the museum’s name with the full identifier, including dots or letters. Then search that museum’s collection website. Add the artist and title if needed, and compare the medium and dimensions before deciding you have found the same object.
One useful question to take back to the artwork
Now try this on a real label. Choose one detail you can see in the work and one thing the label tells you. For example: “I can see pale marks; the label says acrylic on paper.” What would you like to inspect again? That small connection gives the text a purpose.
A longer explanatory paragraph is a separate invitation to think about the work. Do not assume it is a statement by the artist unless it says so. You can keep an unanswered question beside your notes: “Who supplied this title?” or “Does this size include the frame?” The printable card below leaves room for that question as well as the collection identifier.
Museum checklist and note cards — A4 PDF
One page with two cut-out cards: seven questions and a blank record. Print on A4; the cards do not require an exact physical scale.
Sources & further reading
- The Mint Museum: maker, attribution, materials and credit line
- Akron Art Museum: dates, dimensions and a collection number
- New Mexico Museum of Art: object labels and different numbering systems
- MoMA: accession numbers in the Louise Bourgeois catalogue
- Terra Foundation: title, size and other parts of a label